This guide contains affiliate links. We may earn a small commission if you purchase through our links, at no extra cost to you.
This guide is part of our comprehensive Houseplant Pest Mastery Guide.
That gorgeous Monstera you brought home from the nursery looked perfectly healthy. A week later, you noticed spider mites on its leaves. Two weeks after that, half your collection was infested.
This scenario plays out constantly in the houseplant community. New plants are the #1 source of pest introductions. Even reputable nurseries can't maintain completely pest-free environments—the combination of warmth, humidity, and plant density creates perfect pest conditions.
The solution is simple: quarantine every new plant before it joins your collection. Here's exactly how to do it.
Table of Contents
- Why Quarantine Works
- Setting Up Your Quarantine Area
- The Quarantine Timeline
- Inspection Checklist
- Preventive Treatments
- Special Cases
- Graduating to Your Collection
- Frequently Asked Questions
Why Quarantine Works
Quarantine is the cornerstone of integrated pest management. It works because:
Pests Take Time to Become Visible
Many pest infestations aren't obvious at purchase. Eggs may be present but haven't hatched. Early-stage insects are too small to notice. Damage hasn't developed yet.
A thrips infestation can exist on a plant for 2-3 weeks before damage becomes visible. Spider mites multiply quietly on leaf undersides before you notice stippling. By keeping new plants isolated, you allow time for hidden pests to reveal themselves.
Containment Prevents Spread
When pests are caught during quarantine, they're contained to one plant. Without quarantine, that same pest population has 2-4 weeks of unrestricted access to your entire collection—enough time for flying pests to spread everywhere.
Treatment Is Easier on One Plant
Treating a single quarantined plant is straightforward. Treating 20 infested plants is exhausting, expensive, and often unsuccessful. Quarantine keeps problems manageable.
It Becomes Habit
Once you've established quarantine as standard practice, it requires minimal effort. The few minutes spent on inspection and preventive treatment save hours of emergency pest management later.
Setting Up Your Quarantine Area
An effective quarantine area needs to achieve one goal: prevent pest transfer to your main collection.
Location Requirements
Distance: Place quarantine plants at least 10 feet from your collection. Farther is better. A separate room is ideal.
Why distance matters: Many pests can fly or drift on air currents. Spider mites can travel via airflow. Fungus gnats fly. Thrips can jump. Ten feet provides a meaningful buffer.
Avoid air circulation paths: Don't place quarantine plants where airflow from fans or HVAC vents could carry pests toward your collection.
Ideal Quarantine Locations
- Spare bathroom: Separate room with a closable door. Humidity for plants that need it.
- Guest bedroom: Low traffic, easy to keep separate.
- Basement or garage: If temperature-appropriate (above 55°F for most plants).
- Opposite corner of a large room: Not ideal, but workable if you lack a separate room.
What Your Quarantine Needs
Adequate light: Quarantined plants still need appropriate light. A window or grow light keeps plants healthy during their isolation period.
Easy inspection access: You'll be examining plants regularly. Ensure you can easily view all angles and leaf undersides.
Watering supplies: Keep a dedicated watering can or spray bottle for quarantine plants. Don't share tools between quarantine and collection areas.
Yellow sticky traps: Deploy traps near quarantined plants to catch flying pests and monitor for problems.
What to Avoid
- Don't quarantine on the same shelf or table as your collection
- Don't place quarantine plants upwind of your collection
- Don't share tools between quarantine and collection areas without sanitizing
- Don't handle quarantine plants and then immediately handle collection plants
The Quarantine Timeline
Different plant sources warrant different quarantine durations, but the minimum is 2 weeks.
Day 1: Arrival Inspection and Initial Treatment
Immediately upon bringing a new plant home:
- Remove packaging and decorative sleeves: Pests hide in these.
- Conduct thorough inspection: Check all leaf surfaces, stems, soil surface, and drainage holes.
- Place in quarantine area: Isolated from your collection.
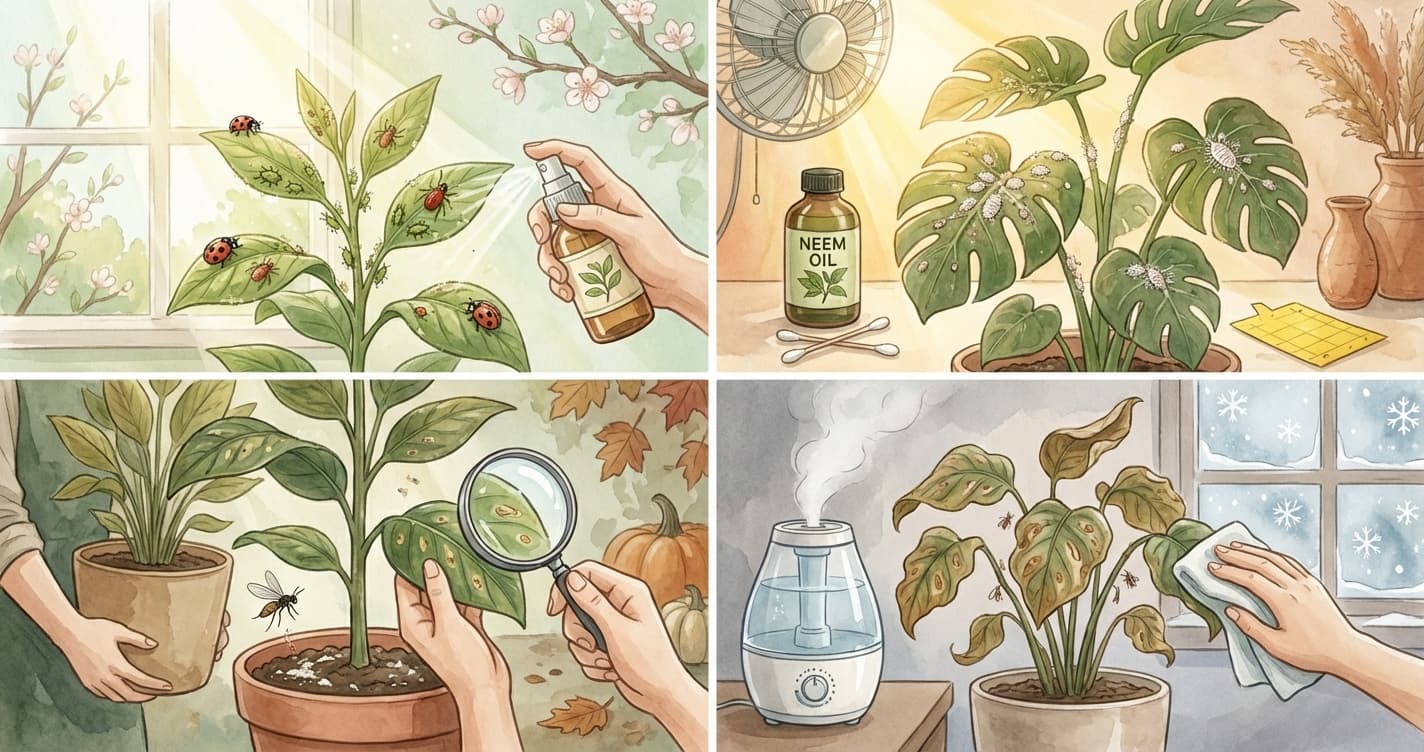
- Apply preventive treatment: Spray with insecticidal soap or neem oil (see Preventive Treatments section).
- Deploy sticky trap: Place a yellow trap near the plant.
- Document condition: Note any existing damage or concerns.
Week 1: Active Monitoring
Days 2-3: Re-inspect plant closely. Some pests become active after the stress of transport subsides.
Days 4-7: Check every few days. Look for:
- New damage appearing (indicates active feeding)
- Insects on sticky trap
- Any visual changes
End of Week 1: Conduct another thorough inspection. If you see any pest signs, begin targeted treatment.
Week 2: Continued Monitoring
Days 8-14: Continue inspecting every few days. Most pest life cycles are 2-3 weeks, so this period catches hatching eggs and emerging adults.
End of Week 2: If no pests detected and the plant appears healthy, you can consider graduation for low-risk sources.
Weeks 3-4: Extended Observation (Recommended)
For higher-risk sources or valuable collections:
Days 15-28: Continued monitoring. A full month ensures you've seen at least one complete pest generation cycle.
End of Week 4: Final comprehensive inspection before graduation.
When to Extend Quarantine
Extend quarantine if:
- You found and treated any pests (restart the clock after treatment)
- Plant came from a high-risk source
- Your collection includes rare or valuable specimens
- You have any uncertainty about plant health
Inspection Checklist
Thorough inspection is the heart of effective quarantine. Use this checklist:
Tools for Inspection
- Magnifying loupe (10-30x magnification)
- Bright light source (flashlight or good window light)
- White paper for tap tests
- Optional: phone macro lens for photos
What to Check
New growth and tender leaves
- Thrips prefer new growth
- Aphids cluster on tender tissue
- Any distortion, curling, or discoloration
Leaf undersides
- Spider mites, whitefly nymphs, and scale often hide here
- Check along veins where pests congregate
- Look for eggs, webbing, or waxy deposits
Leaf joints and axils
- Mealybugs hide in crevices
- Check where leaves meet stems
- Look for cottony masses or white residue
Stems
- Scale appears as brown bumps
- Mealybugs may colonize stem joints
- Check woody portions carefully
Soil surface
- Fungus gnats hover near moist soil
- Look for tiny larvae if you dig gently
- White mold (harmless) vs. pest activity
Root zone (if repotting)
- Root aphids are white and clustered on roots
- Healthy roots are white/tan; sick roots are brown/mushy
- Check for soil insects
The Tap Test
Hold white paper under plant foliage and tap leaves sharply. Pests fall onto paper:
- Spider mites: tiny red/brown dots that move
- Thrips: slender insects that jump
- Other crawling pests become visible against white background
Signs That Warrant Treatment
- Any visible insects (even one)
- Webbing (spider mites)
- Cottony masses (mealybugs)
- Sticky residue (honeydew = sap-feeding pests)
- Silver streaks or black specks (thrips)
- Multiple yellow sticky trap catches
For help identifying what you find, see our pest identification guide.
Preventive Treatments
Preventive treatment at the start of quarantine provides a safety margin against pests that inspection misses.
Option 1: Insecticidal Soap
Insecticidal soap kills soft-bodied insects on contact without residual effects.
Application: Spray all plant surfaces thoroughly, including leaf undersides and stems. Repeat after 5-7 days.
Best for: General prevention, especially against aphids, mealybugs, whiteflies, and spider mites.
Option 2: Neem Oil
Neem oil provides broader protection—it disrupts feeding and development while acting as a light repellent.
Application: Mix according to package directions. Spray thoroughly in evening or when plant won't receive direct sun for several hours. Repeat after 7-10 days.
Best for: Broader prevention, especially if you're concerned about thrips or scale.
Option 3: Combined Approach
For maximum protection (high-risk sources or valuable collections):
- Day 1: Insecticidal soap
- Day 5-7: Neem oil
- Day 12-14: Insecticidal soap
This provides overlapping protection and catches different life stages.
Soil Treatment
For plants in soil (not bare root):
Let soil dry slightly: Reduces fungus gnat appeal and allows you to assess watering needs.
Optional BTI treatment: Mosquito Bits applied to soil kill fungus gnat larvae. Effective even if no gnats are visible.
Special Cases
Some situations require modified quarantine approaches.
Mail-Order and Shipped Plants
Plants shipped through mail experience significant stress and may have been in transit for days. They're also more likely to harbor pests from distribution facilities.
Extended quarantine: 4 weeks minimum Additional measures:
- Inspect packaging for hitchhikers
- Unpack outdoors if possible
- Document condition with photos (for seller communication if needed)
- Be patient—stress symptoms may appear before pest symptoms
Plant Swaps and Cuttings from Friends
Social plant exchanges are wonderful but risky. You don't know how your friend's plants have been maintained.
Treat as high-risk: Full 4-week quarantine Inspect donor plant if possible before accepting cuttings Water-propagated cuttings: Still quarantine once potted—pests may have been present on the cutting
Plants Returning from Outdoors
Plants summered outside almost certainly encountered pests. Bringing them inside in fall is a critical pest management moment.
Treat aggressively before bringing inside:
- Inspect thoroughly
- Spray with insecticidal soap and neem oil
- Consider systemic treatment 1-2 weeks before move
- Quarantine as if new (full 4 weeks)
- Clean pots and saucers
For detailed seasonal guidance, see our seasonal pest management guide.
Nursery Purchase vs. Big-Box Store
Specialty nurseries often (but not always) have better pest management than big-box retailers. However, any commercial growing environment has pest pressure.
Specialty nursery: 2-week minimum, 4 weeks recommended Big-box store/supermarket: 4 weeks minimum, thorough initial treatment
Rescue Plants and Deeply Discounted Specimens
Plants on clearance are often stressed, and stress attracts pests. The discount isn't worth it if the plant brings problems.
Extended quarantine: 4-6 weeks Consider isolation even if pest-free: Stressed plants may have underlying issues Be prepared to discard: Sometimes the compassionate choice isn't worth the risk
Graduating to Your Collection
After successful quarantine, plants can join your collection. But make this transition thoughtfully.
Graduation Criteria
Before graduating a plant:
✓ Completed minimum quarantine period without pest signs ✓ Final thorough inspection shows no pests ✓ Sticky trap has been clean for at least a week ✓ Plant appears healthy with no unusual damage ✓ You feel confident the plant is safe
Graduation Process
- Final inspection: Complete, thorough examination
- Clean the pot and saucer: Remove any debris
- Choose placement thoughtfully: Don't immediately place next to your most valuable specimens
- Continue monitoring: Watch the new plant and its neighbors for 2 weeks after graduation
When Not to Graduate
- Any uncertainty about pest status
- Plant has been treated for pests during quarantine (restart clock)
- Plant health is questionable (quarantine until resolved)
- Your "gut" says something is off
Trust your instincts. Another week of quarantine is always better than a collection-wide infestation.
Frequently Asked Questions
How long should quarantine really be?
Minimum 2 weeks for low-risk sources (reputable nursery, healthy-appearing plant). Four weeks for higher-risk sources or valuable collections. When in doubt, err on the side of longer.
Can I skip quarantine for plants from reputable nurseries?
No. Even the best nurseries have pest pressure. Commercial growing environments—warm, humid, high plant density—are ideal for pests. Quarantine everything.
What if I don't have a separate room?
Use the farthest corner of your space, at least 10 feet from your collection. Avoid placing quarantine plants upwind or where you frequently walk between them and your collection.
Should I repot during quarantine?
Generally, wait until after quarantine unless: the plant is in poor soil causing problems, you need to inspect roots, or repotting is part of your standard intake process. Repotting during quarantine is fine but adds stress to an already stressful period.
What if I find pests during quarantine?
Treat the specific pest using appropriate methods. After treatment is complete and the plant appears pest-free, restart the quarantine clock. A plant that had pests needs 2-4 more weeks of observation after successful treatment.
Do I need to quarantine cuttings I take from my own plants?
No. Cuttings from your established collection don't need quarantine—they're already part of your ecosystem. However, if you take cuttings from a friend's plant or receive them by mail, quarantine applies.
How do I quarantine when I live in a small space?
Create maximum practical distance. Even 6 feet with a physical barrier (shelf, bookcase) is better than nothing. Use sticky traps for early warning. Be extra vigilant about inspection.
Is quarantine necessary for succulents?
Yes. Succulents can harbor mealybugs, scale, and other pests. Their thick leaves can hide pests well. Apply the same quarantine principles.
Key Takeaways
Quarantine is your single most effective pest prevention tool:
- Every new plant, every time: No exceptions, regardless of source
- Minimum 2 weeks: 4 weeks for higher-risk situations
- Distance matters: At least 10 feet from your collection
- Inspect regularly: Check every few days during quarantine
- Treat preventively: Initial spray provides safety margin
- Graduate thoughtfully: Final inspection before integration
The effort you invest in quarantine pays dividends in the infestations you never have to fight.
For the complete pest management framework, return to our Houseplant Pest Mastery Guide.